
DIY Pergola Kits: Best Kits You Can Actually Install Yourself

You have been looking at pergolas for months. Maybe years. You have compared dozens of brands, bookmarked product pages, and watched enough YouTube install videos to qualify for a contractor's license. But here is the question that keeps coming back: can you actually install one yourself?
The answer is yes. But only if you buy the right kit.
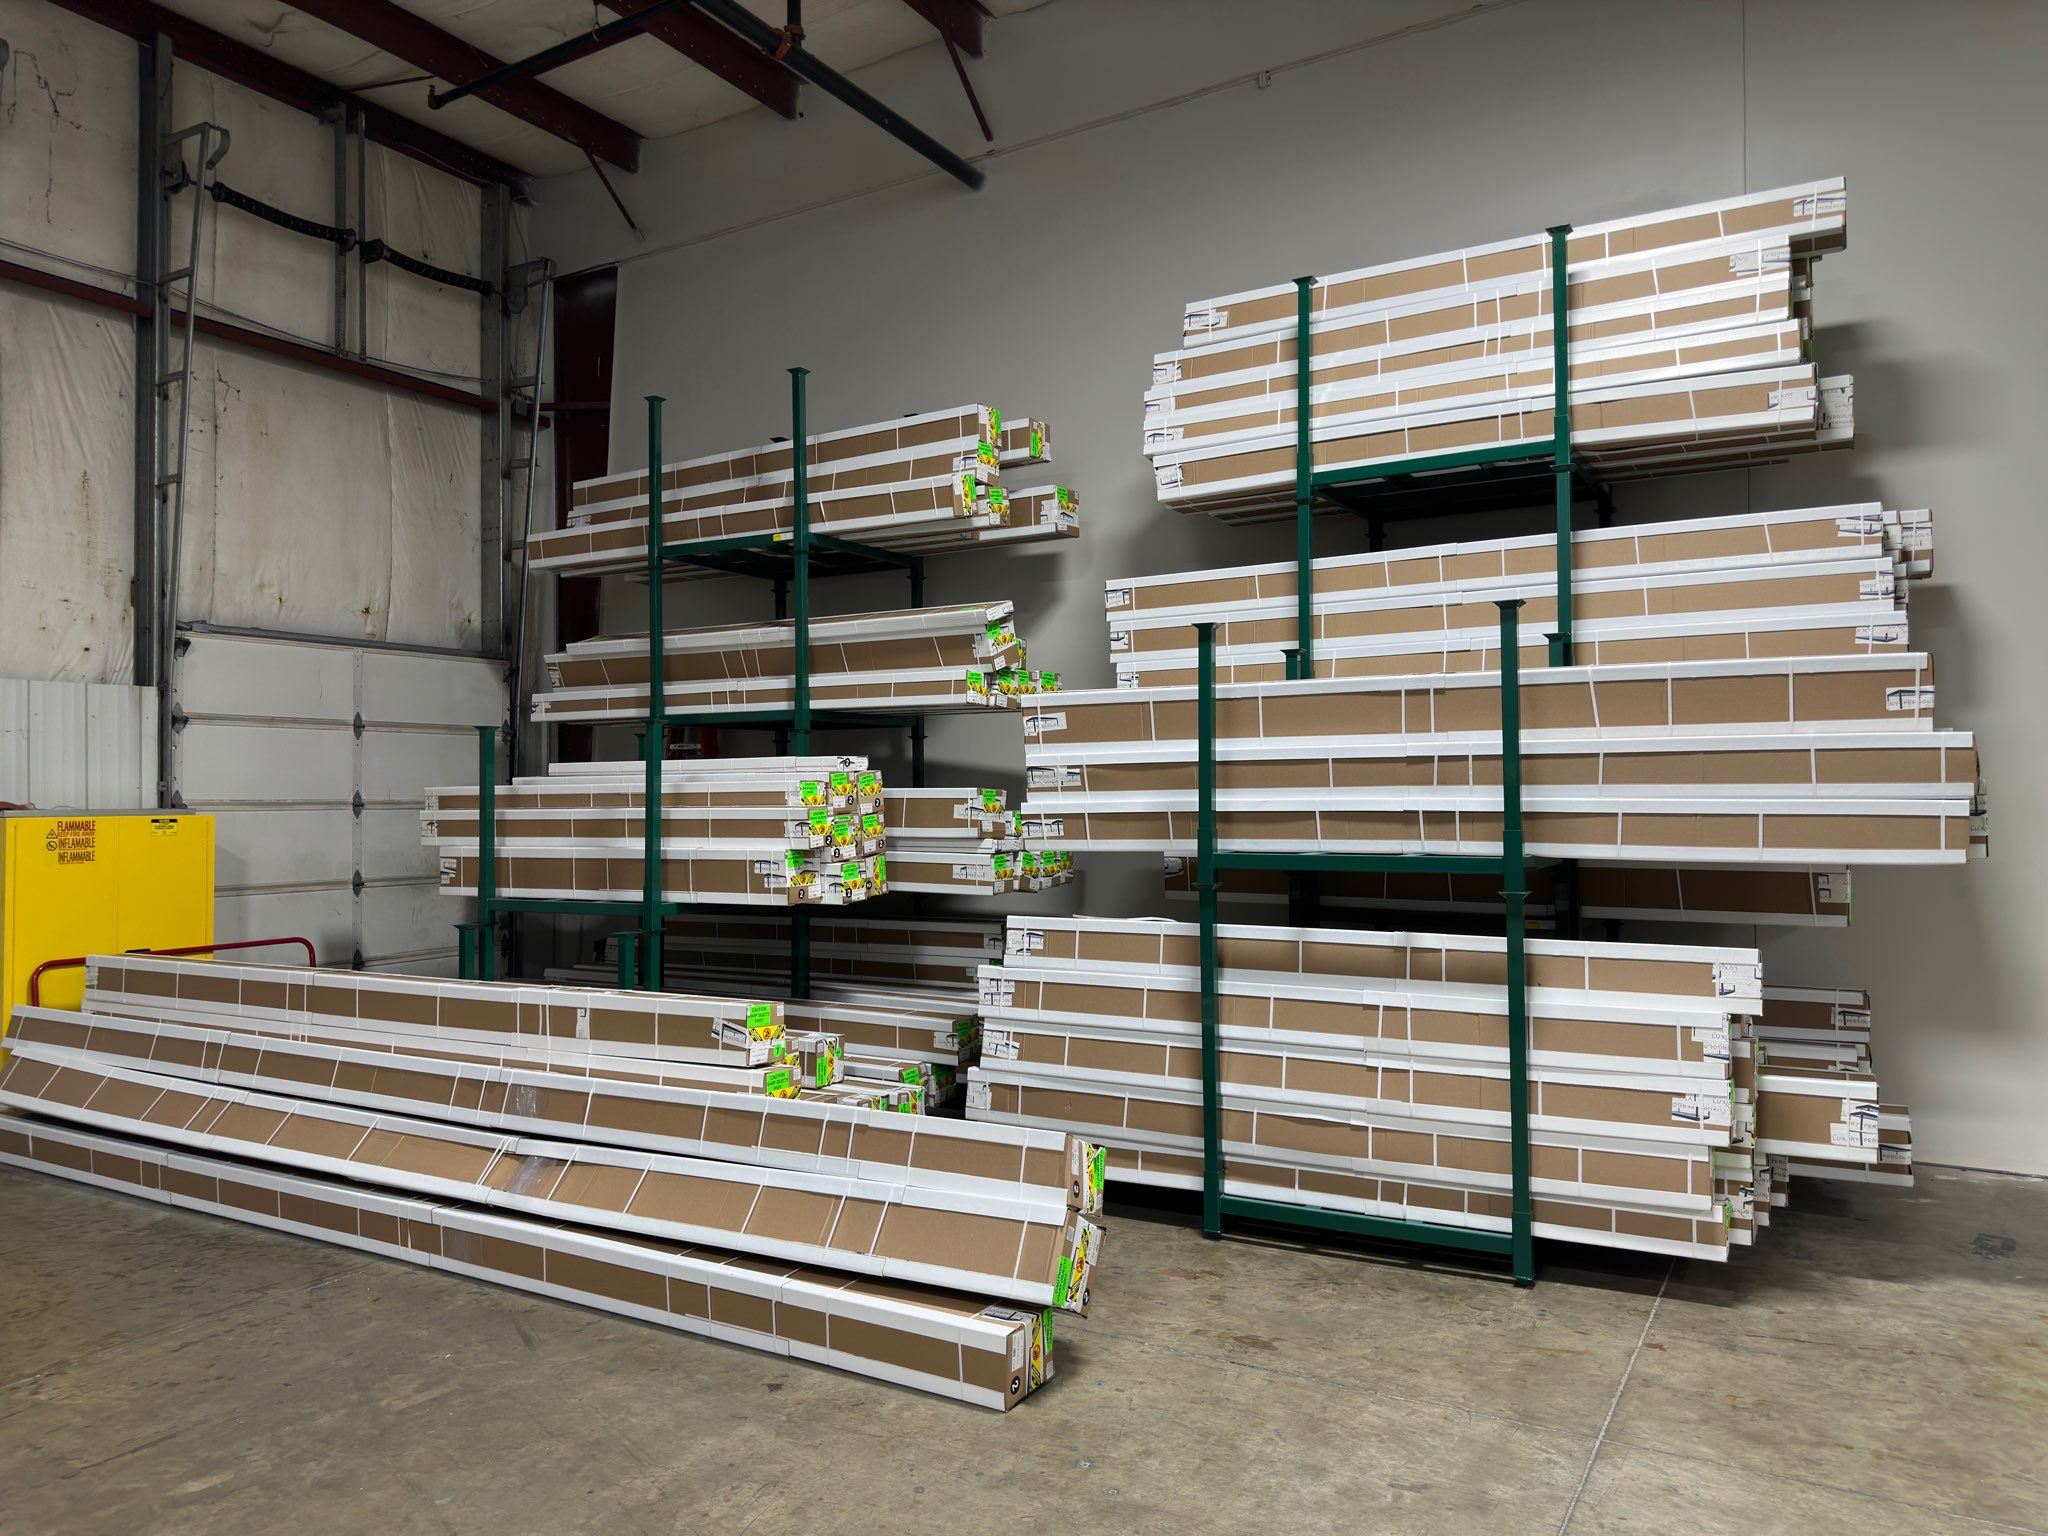
The difference between a smooth weekend project and a frustrating disaster comes down to what shows up on that delivery truck. Some DIY pergola kits arrive pre-cut, pre-drilled, and ready to assemble with basic hand tools. Others show up as raw lumber or loose extrusions with vague instructions and zero pre-drilling, leaving you to figure out the rest.
This guide breaks down every type of DIY pergola kit on the market in 2026. We will compare aluminum, wood, and vinyl kits side by side. We will cover the exact tools you need, realistic time estimates, common mistakes that trip up first-timers, and a cost comparison between doing it yourself and hiring a contractor. Whether you are comfortable with a drill or just getting started, you will know exactly which pergola kit matches your skill level by the time you finish reading.
What Makes a Kit "DIY"?
Every pergola manufacturer claims their product is "easy to assemble." That phrase has become so overused it means nothing. A real DIY pergola kit has specific features that separate it from a pile of parts with an Allen wrench.
Here is what to look for in a genuinely DIY-friendly kit:
Pre-Cut Components
Every beam, rafter, post, and bracket should arrive cut to the exact dimensions of your order. If you need to break out a miter saw or chop saw to resize anything structural, it is not a true DIY kit. Pre-cut means pre-cut. No trimming, no custom cuts, no "cut to fit on site."
Pre-Drilled Holes
This is the biggest time saver and the single feature that separates a weekend project from a week-long ordeal. Every bolt hole, screw location, and connection point should already be drilled at the factory. You line up the holes, insert the hardware, and tighten. That is it. If a kit requires you to drill into structural members, you need a higher skill level and better tools, and the margin for error increases dramatically.
No Welding Required
This should go without saying, but some metal pergola kits still require field welding for certain joints. If welding is listed anywhere in the instructions, walk away. That is a fabrication project, not a DIY install.
All Hardware Included
Bolts, nuts, washers, brackets, anchors, and any specialty fasteners should come in the box. Labeled and organized by assembly step is the gold standard. If you need to make a hardware store run to buy specific bolts or brackets, the manufacturer cut corners on the kit.
Clear, Step-by-Step Instructions
Printed manuals with diagrams, video walkthroughs, and phone support for questions during install. The best manufacturers will walk you through every step over the phone if you get stuck. The worst ship a single page of diagrams with no part labels.
What "Some Assembly Required" Actually Means
Be careful with this phrase. In the furniture world, "some assembly required" means 20 minutes with an Allen wrench. In the pergola kit world, it can mean anything from a genuine afternoon project to a multi-day build requiring specialized tools, a concrete mixer, and three friends who owe you favors.
The real test: if a homeowner with basic tool experience (can use a drill, level, and socket wrench) can complete the install in one day with one or two helpers, it qualifies as a real DIY pergola kit. Anything beyond that is a contractor project being marketed as DIY.
DIY Pergola Kit Materials Compared
The material you choose determines how difficult your install will be, what tools you need, and how much maintenance you are signing up for over the next 10 to 20 years. Here is an honest comparison across the three main DIY pergola kit materials.
| Feature | Aluminum | Wood (Cedar) | Vinyl |
|---|---|---|---|
| Assembly Difficulty (1-5) | 2 | 4 | 2 |
| Tools Needed | Drill, socket set, level | Drill, saw, level, clamps, chisel | Drill, level, rubber mallet |
| Weight Per Post | 45-120 lbs | 60-90 lbs | 15-30 lbs |
| Solo Install Possible? | No (2-3 people) | No (2-4 people) | Possible for small sizes |
| Maintenance After Install | None (rinse annually) | Stain/seal every 2-3 years | Rinse annually |
| Cost Range (10x12) | $4,000 - $22,000+ | $2,500 - $8,000 | $1,500 - $4,000 |
| Lifespan | 25+ years (lifetime warranty available) | 10-20 years (with maintenance) | 10-15 years |
| Wind Rating | Up to 200+ mph (premium kits) | Varies (60-100 mph typical) | 50-80 mph |
The takeaway: aluminum kits are the easiest to assemble and require the least maintenance. Wood kits offer a traditional aesthetic but demand more tools, more skill, and ongoing upkeep. Vinyl is the lightest and cheapest but sacrifices durability and customization.
When shopping for pergola kits DIY, your choice depends on three things: your budget, how comfortable you are with tools, and how much time you want to spend maintaining it after the build is done.
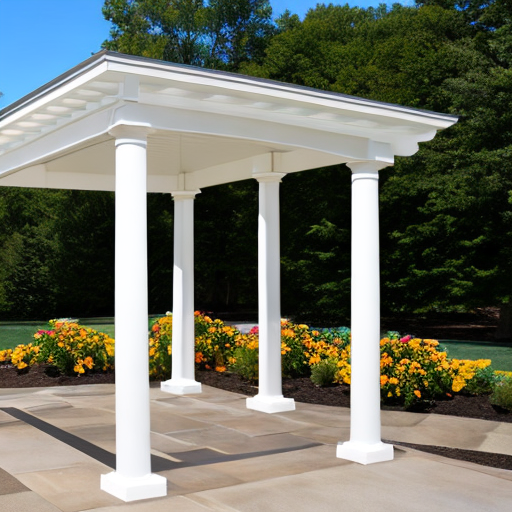
Best DIY Aluminum Pergola Kits
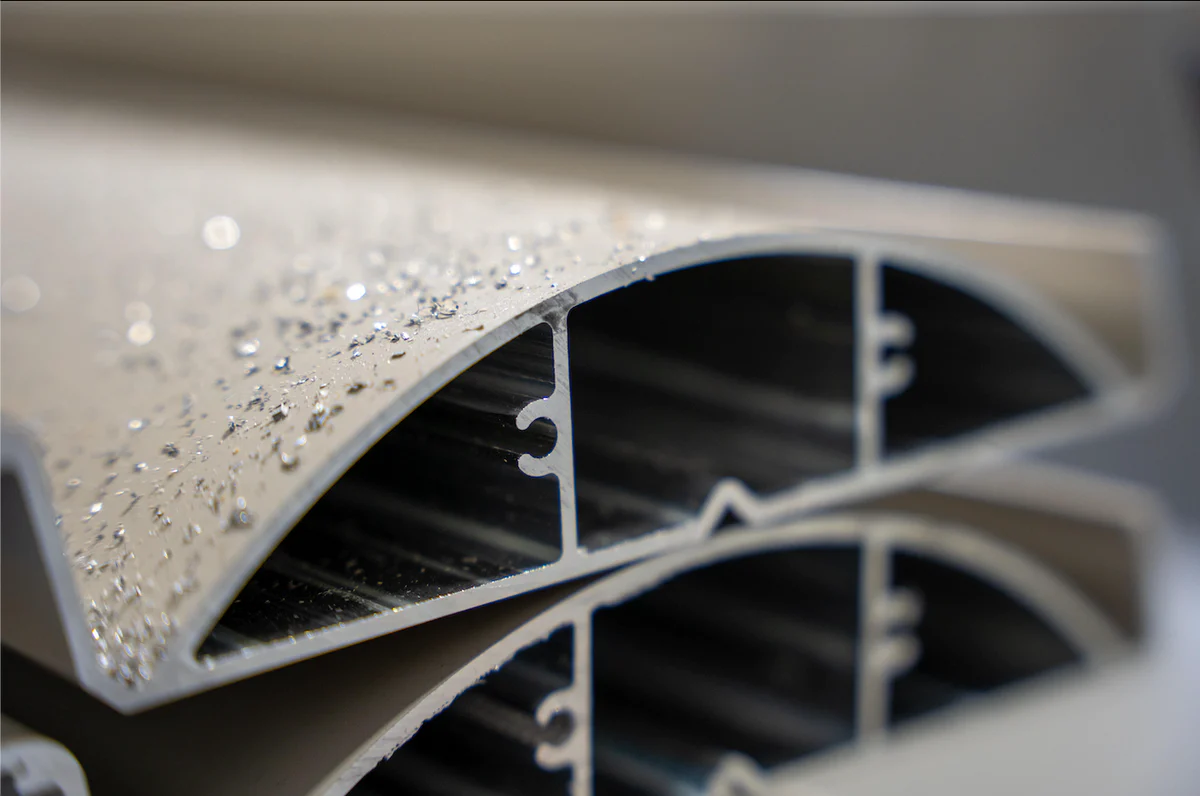
Aluminum is the gold standard for DIY pergola kits if your priority is a clean install with minimal headaches. Here is why: aluminum does not rot, does not need staining, does not warp in heat, and can be precision-cut and pre-drilled at the factory down to the millimeter. That factory precision translates directly into an easier install for you.
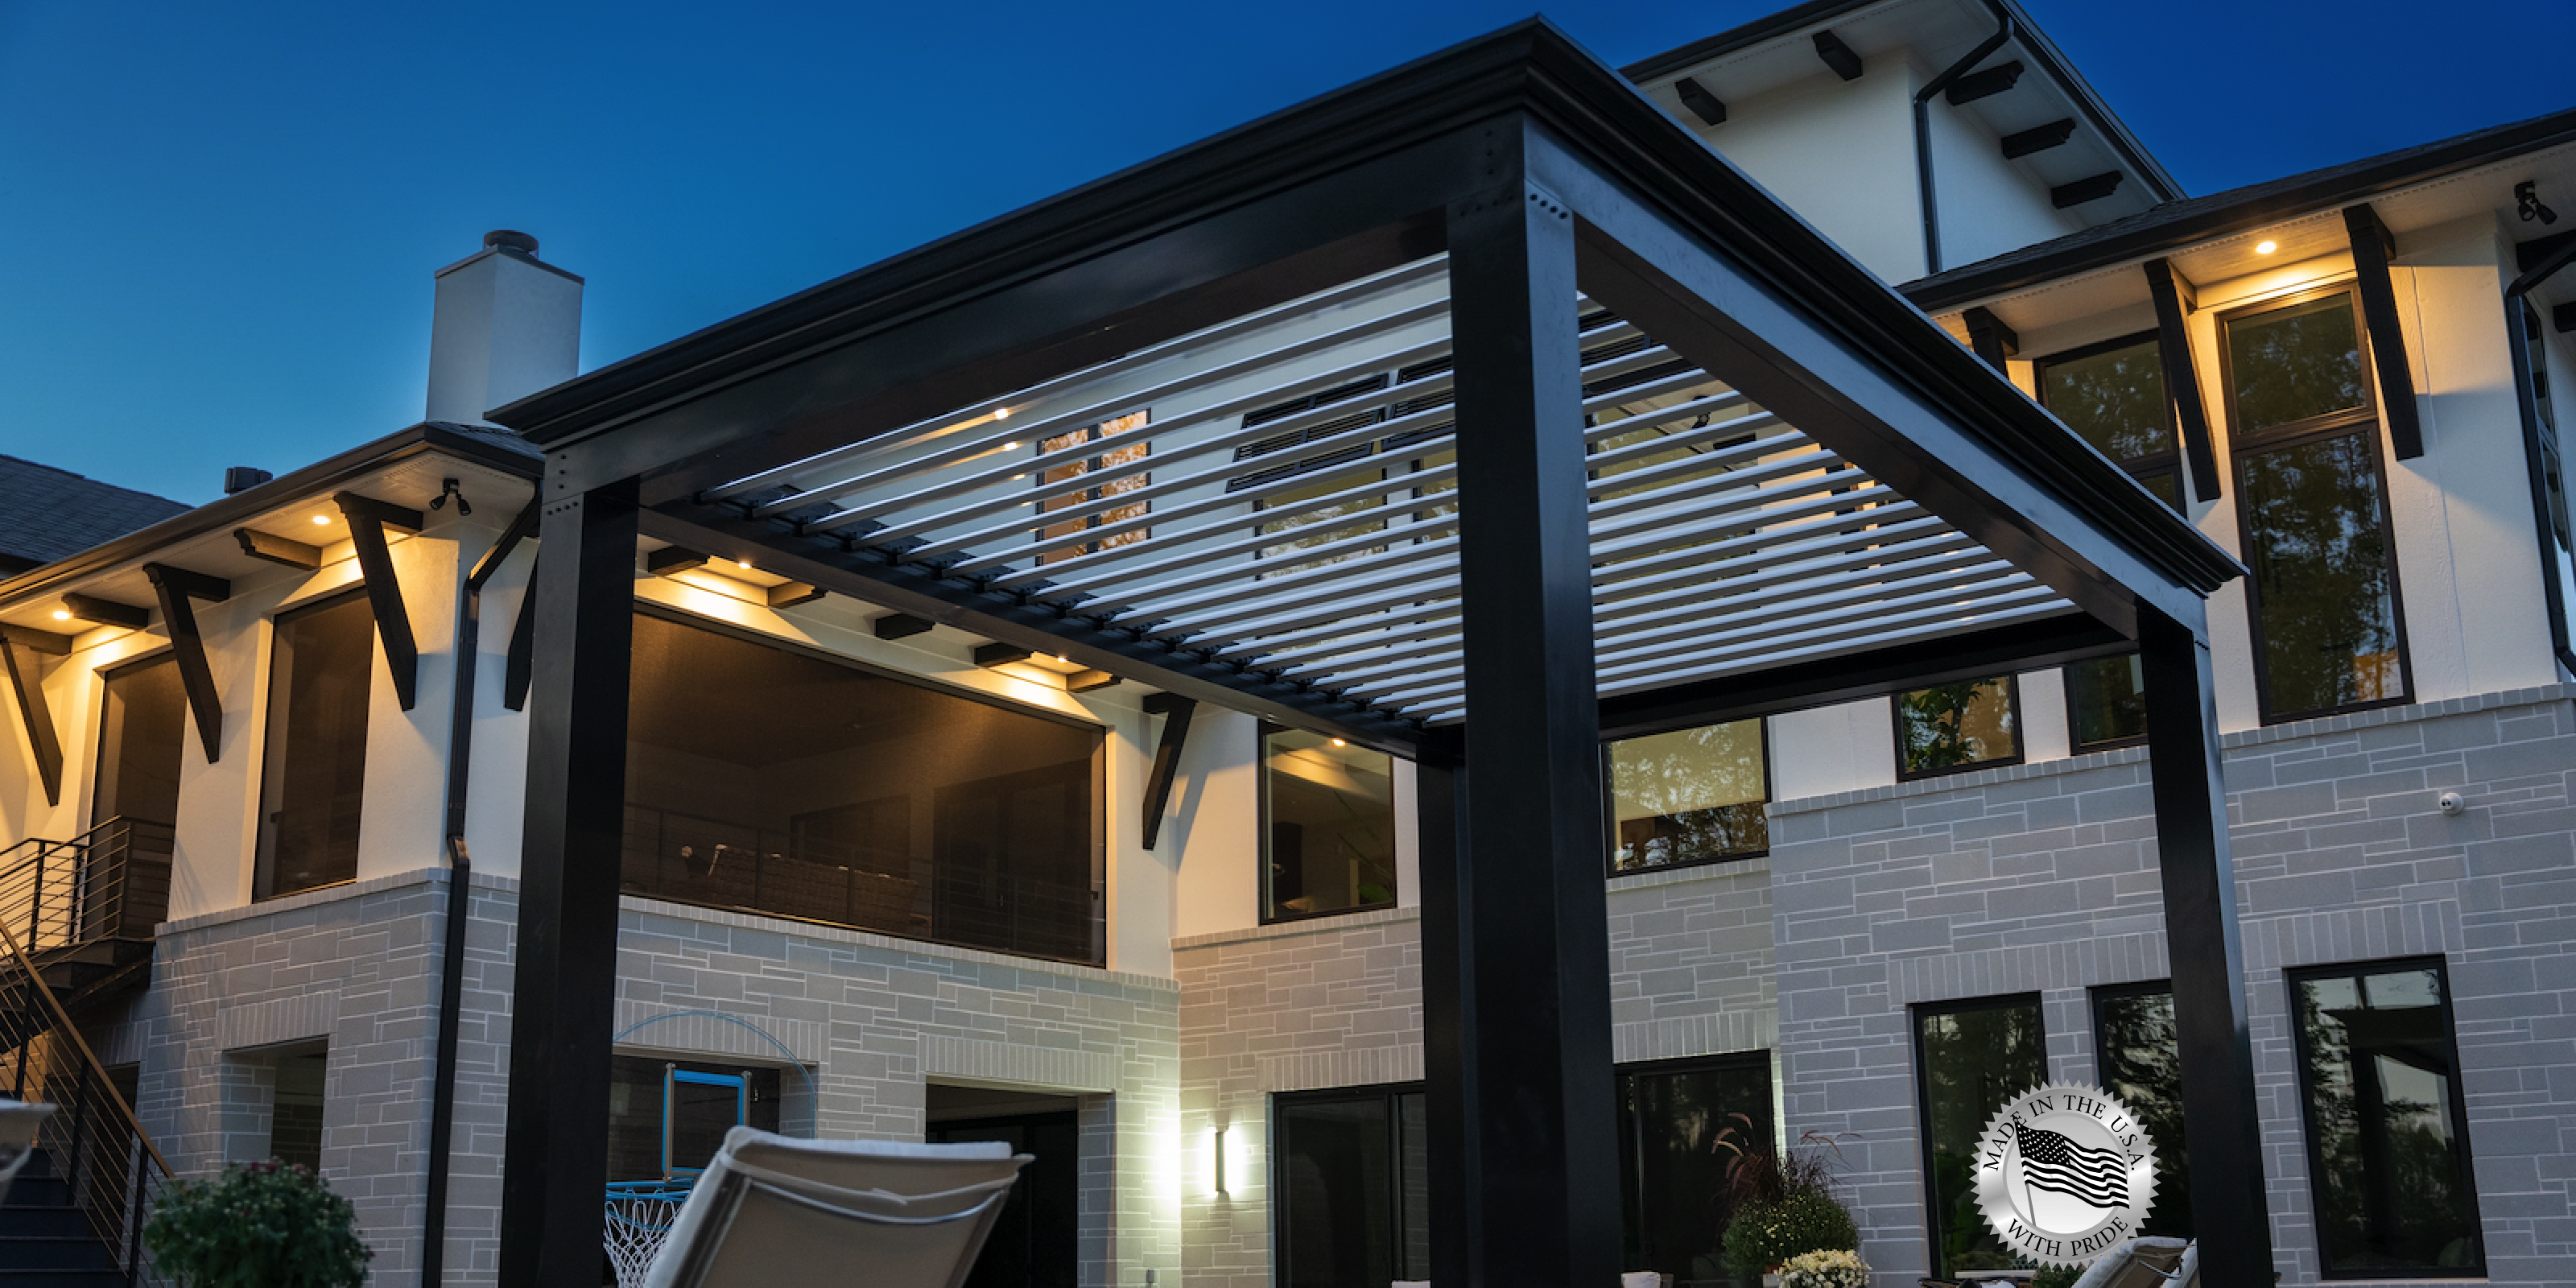
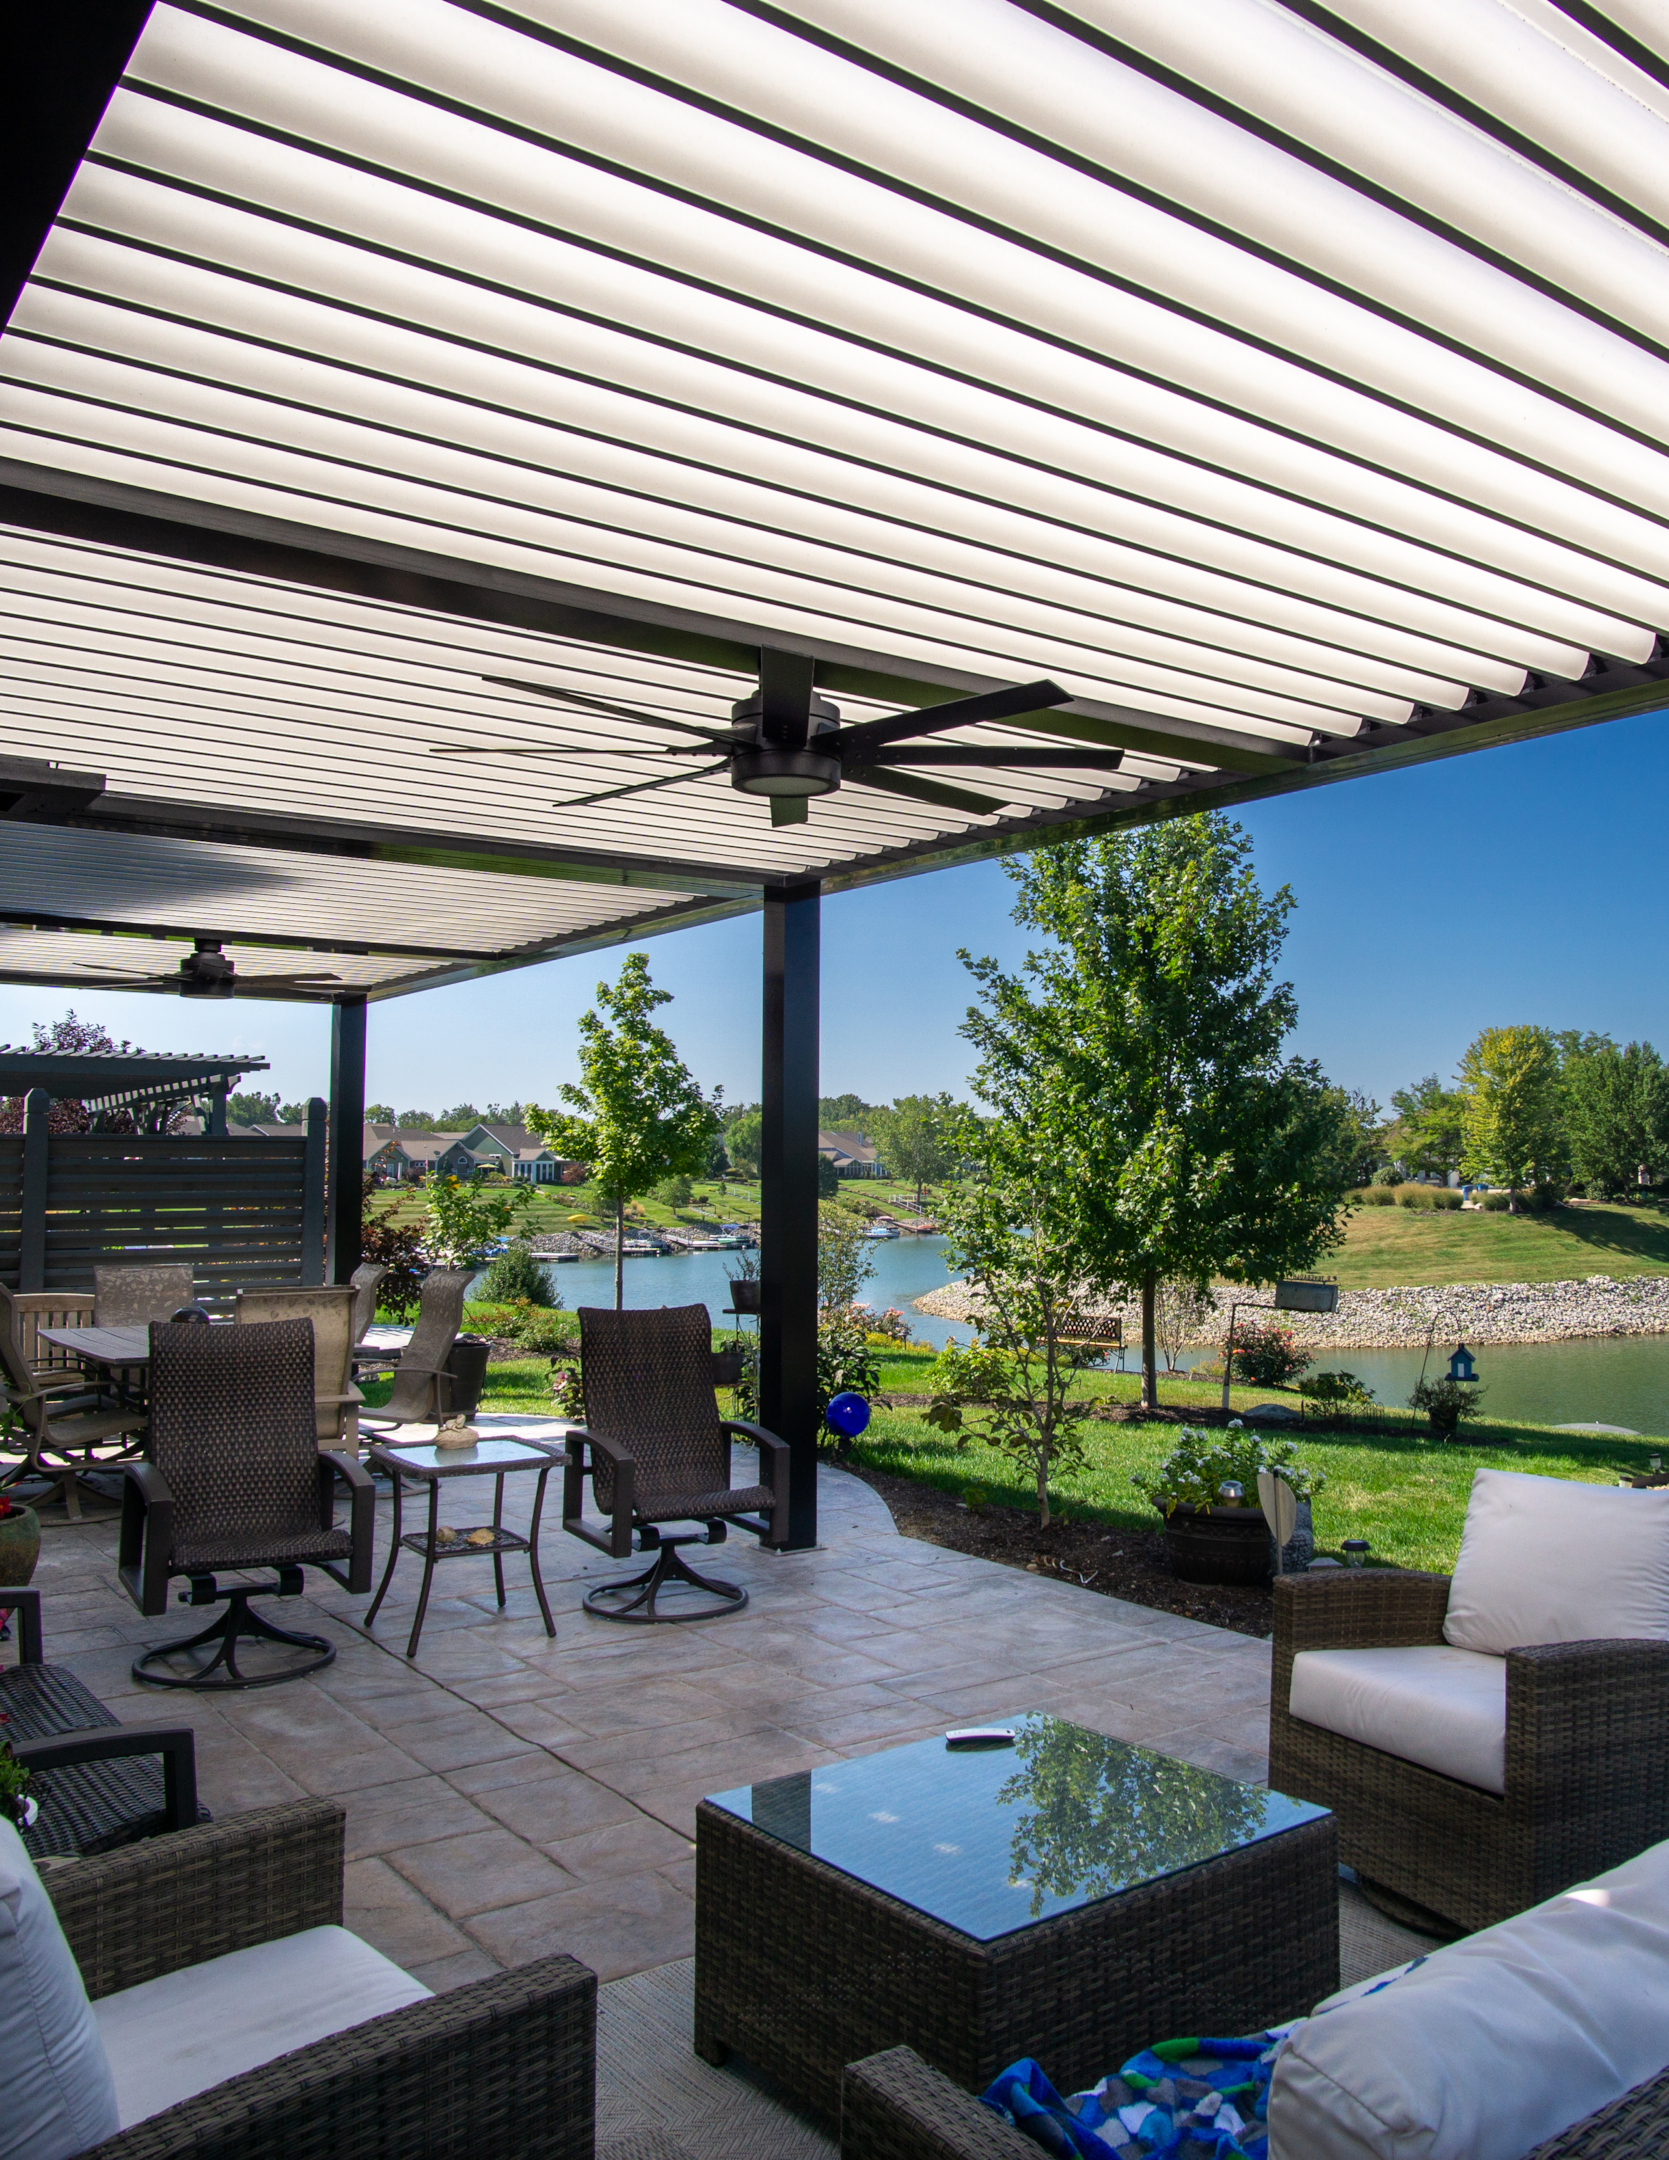
The Luxury Pergola (Top Pick for DIY)

The Luxury Pergola builds what is arguably the most install-friendly aluminum pergola kit on the market. Every unit ships from their Indiana factory with every hole pre-drilled, every component pre-cut, and all mounting hardware included. Their aluminum pergola kits are designed specifically for homeowner installation, not contractor crews with specialized equipment.
What sets their DIY pergola kit apart:
- Assembly time: Approximately 8 to 10 hours with 2 to 3 people. Most homeowners complete the build in a single day.
- What is included: All structural posts, beams, motorized louvers, motor, remote control, electrical components, all mounting hardware, detailed instructions, and access to phone support during your install.
- No cutting, no drilling, no welding: Every connection is bolt-together using pre-drilled holes. Line up, bolt, tighten.
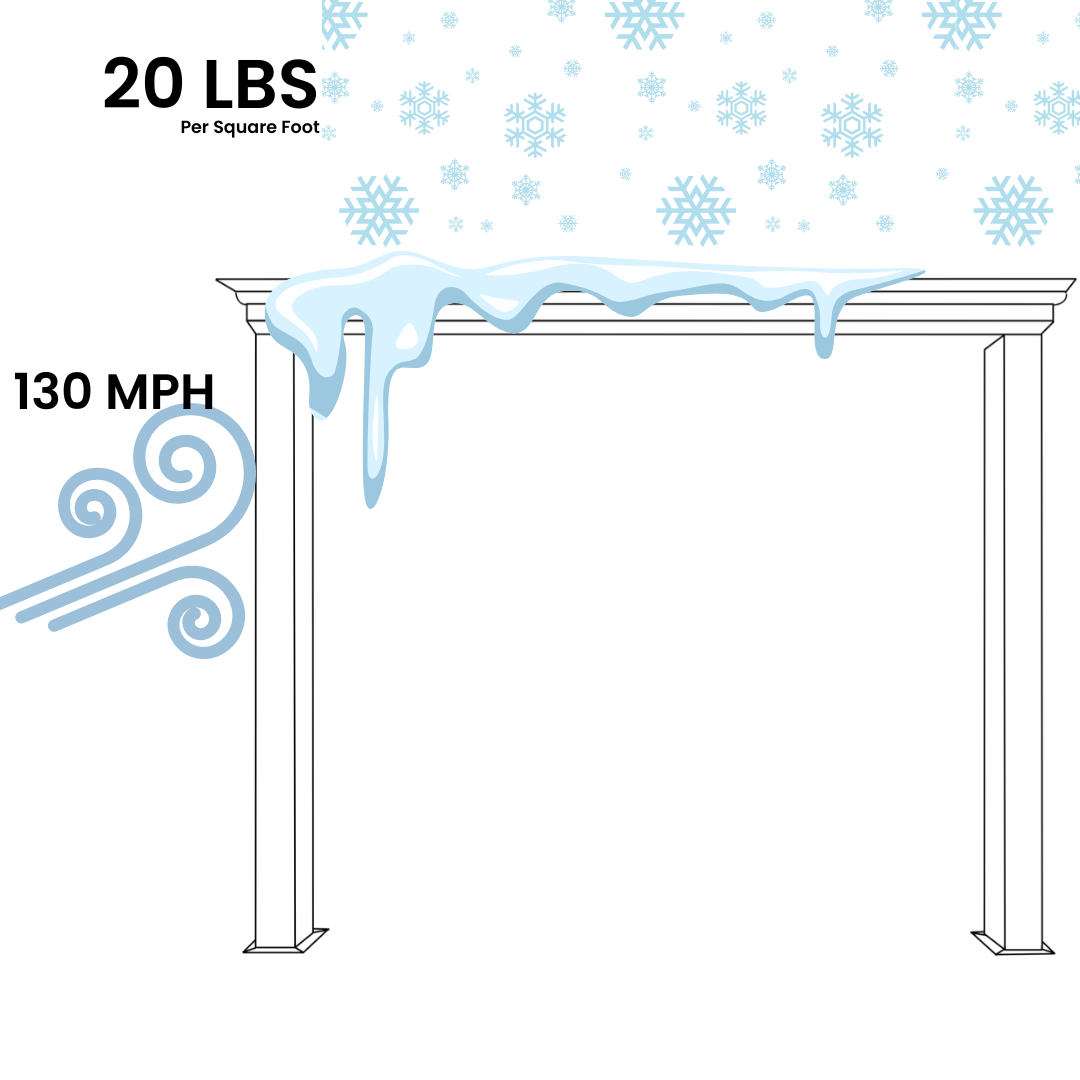
- Weight: A 10x13 unit weighs approximately 1,800 lbs total. That is 4 to 8 times heavier than imported kits, which is why it handles up to 200+ mph winds (closed) and up to 65 psf snow loads.
- ElectroLayer powder coat: Proprietary finish that resists fading, chipping, and scratching. Zero maintenance beyond an annual rinse.
- Lifetime warranty: Frame, louvers, motor, and electronics. Not 5 years. Not 10 years. Lifetime.
- Made in the USA: Designed, extruded, and powder-coated in Indiana. 97% USA-sourced materials.
The biggest advantage for DIY installers: The Luxury Pergola's engineering team is available by phone during your build. If you hit a snag at step 14, you call them. That level of support is rare in the pergola industry and makes a real difference when you are standing on a ladder trying to align a beam.
Configure your kit and get an instant price using their online tool.
Other Aluminum DIY Pergola Kit Brands
BON Pergola: A DTC brand offering motorized aluminum kits at a lower price point. Lighter construction than The Luxury Pergola (typically 250-450 lbs total). Lower wind and snow ratings. Decent option if you are in a mild climate and want to spend less.
PERGOLUX: Another direct-to-consumer option with aluminum kits. Standard powder coating (not as durable as premium coatings). Limited size configurations. Shorter warranty period.
Purple Leaf: Budget-friendly louvered pergola kits available on Amazon. Lightweight aluminum construction. Good for buyers who want a basic louvered system without the commercial-grade engineering. Not built for extreme weather.
When comparing the best pergola kits, pay attention to total unit weight, wind and snow ratings, and warranty length. Those three specs tell you more about quality than any marketing claim.
Best DIY Wood Pergola Kits
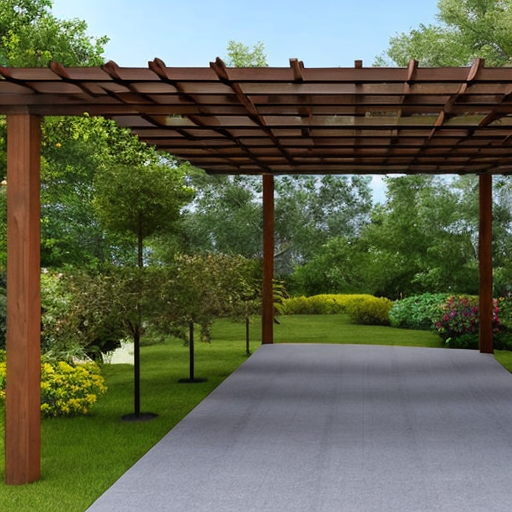
Wood pergola kits deliver a natural, traditional look that some homeowners prefer. Cedar and redwood are the two most common species for pergola kits because they resist rot and insects better than pressure-treated pine. But be honest with yourself about the skill level required here. Wood pergola kits are a step up in difficulty from aluminum.
What Makes Wood Kits Harder
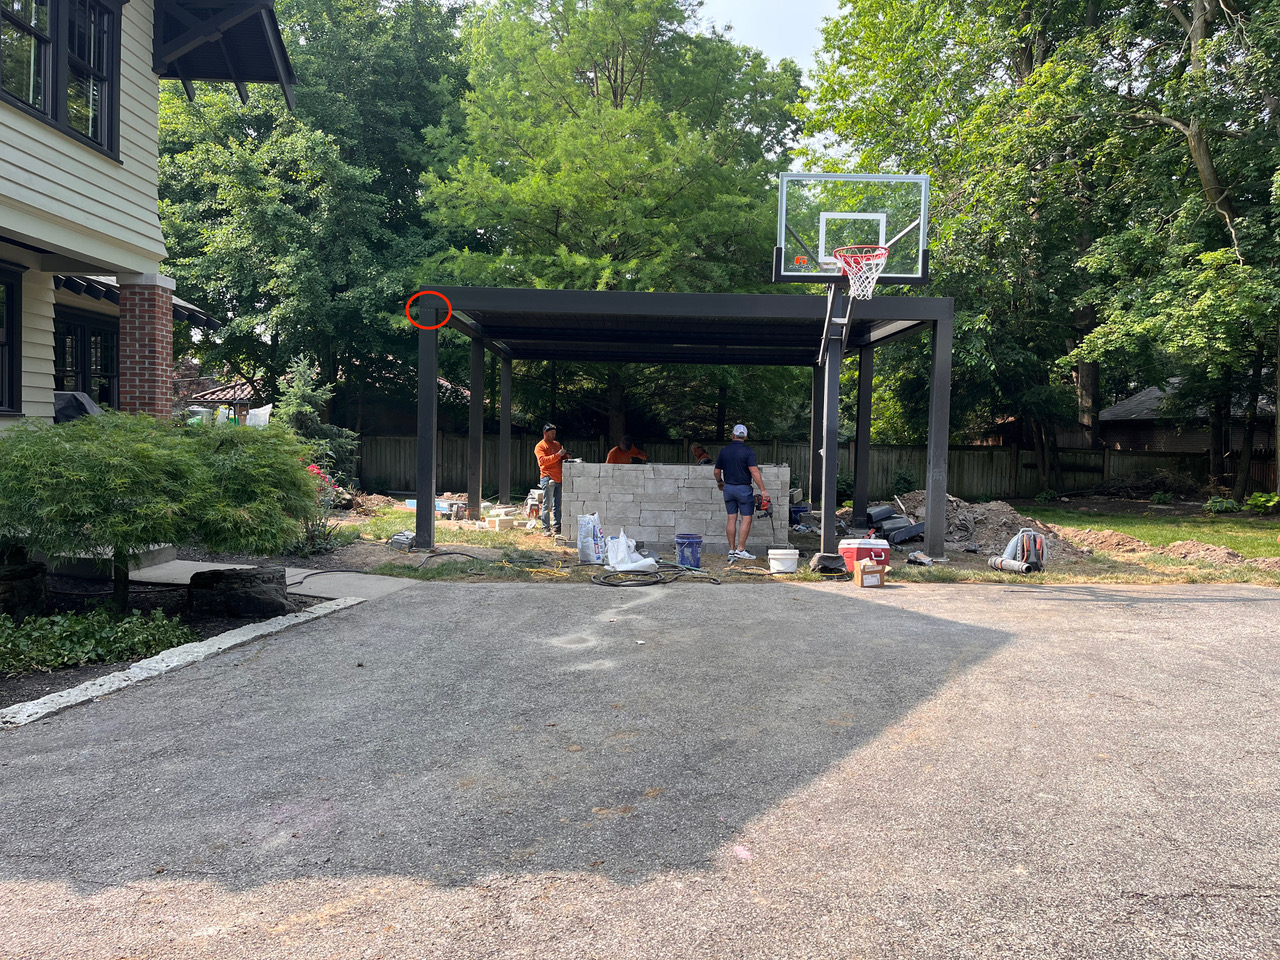
Most wood pergola kits are not fully pre-drilled. You will need to drill pilot holes for lag bolts. Some require cutting rafters to length or notching beams for joinery. Wood is also heavier and more unwieldy than aluminum extrusions, so you will want 3 to 4 people for raising posts and beams.
The tool list is longer too. Beyond a basic drill and level, you will likely need a circular saw or miter saw, wood clamps, a chisel set for notches, and a post level. If you have a well-stocked workshop, no problem. If your tool collection stops at a cordless drill, budget an extra $200 to $400 for tool purchases or rentals.
Top Wood Pergola Kit Brands
Pergola Depot: One of the more established wood kit suppliers. Ships cedar and pressure-treated pine kits in standard sizes. Components are rough-cut to size but typically need some trimming and all drilling on site. Decent instructions. Budget $3,000 to $7,000 for a 10x12 cedar kit.
PergolakitsUSA: Offers both cedar and redwood options in a range of standard sizes. Their kits come with more pre-cut components than some competitors, but you will still need to handle drilling and some cutting. Price range: $2,500 to $6,500 for most residential sizes.
Bjorn Woodworks: Premium cedar kits with mortise-and-tenon joinery. These look beautiful but require a higher skill level. The joinery is more complex than simple bolt-together assembly. Best for experienced woodworkers who want a showpiece. Pricing starts around $4,000 for smaller kits.
The Ongoing Maintenance Reality
Here is what the wood pergola kit brands do not emphasize in their marketing: a cedar pergola needs to be sanded and re-stained or re-sealed every 2 to 3 years. Skip that maintenance and you will see graying, cracking, and eventually rot. Over a 15-year span, you are looking at $1,500 to $3,000 in stain, sealant, and your time on a ladder with a paintbrush. Factor that into your total cost comparison.
Best DIY Vinyl Pergola Kits
Vinyl pergola kits are the budget entry point for DIY pergola kits. They are lightweight, often snap together without specialized tools, and they do not need painting or staining. For homeowners on a tighter budget who want a basic structure, vinyl can work. But there are tradeoffs you need to understand.
Pros of Vinyl DIY Kits
- Lightest material: Posts weigh 15 to 30 lbs each. Easier to handle and position, especially with fewer helpers.
- Snap-together assembly: Many vinyl kits use friction-fit or snap-lock connections that go together quickly.
- No maintenance: No painting, staining, or sealing. Hose it off once a year.
- Lowest price: A basic 10x12 vinyl pergola kit runs $1,500 to $4,000.
Cons of Vinyl DIY Kits
- Lower structural ratings: Most vinyl pergolas top out at 50 to 80 mph wind ratings. In a serious storm, that is a problem.
- Limited sizes: Vinyl kits come in fixed sizes. Custom dimensions are rare or unavailable.
- No louvers or motorization: Vinyl pergolas are almost always open-rafter designs. No adjustable shade, no rain protection.
- Yellowing and brittleness: After 8 to 12 years of UV exposure, vinyl can yellow and become brittle. Replacement, not repair, is the only option at that point.
- Looks budget: There is no way around this. Vinyl lacks the structural presence and visual weight of aluminum or wood. Up close, it looks and feels like what it is: plastic.
When Vinyl Makes Sense
If you need a basic shade structure for under $3,000, you live in a mild climate without extreme wind or snow, and you plan to replace the structure in 10 to 15 years, vinyl is a reasonable choice. If you are investing in a permanent outdoor living space, skip vinyl and look at aluminum or quality cedar.
Tools You Need for a DIY Pergola Install
Your tool requirements depend entirely on the material you choose. Here is a complete breakdown so you can check your garage before ordering.
Tools for Aluminum DIY Pergola Kits
What you probably already own:
- Cordless drill/driver (18V or 20V)
- Socket wrench set (metric and standard)
- 4-foot level
- Tape measure (25 ft minimum)
- Step ladder (6 to 8 ft)
- Adjustable wrench
What you might need to buy or rent:
- Impact driver (makes bolt tightening faster, not required but recommended)
- Extension ladder (if mounting to a second-story fascia)
- Concrete drill bit set (if anchoring to an existing concrete slab)
- Hammer drill (for concrete anchoring only)
Tools for Wood Pergola Kits
Everything above, plus:
- Circular saw or miter saw
- Wood clamps (at least 4)
- Chisel set (if notching is required)
- Post level (straps to the post for hands-free leveling)
- Speed square
- Drill bit set for wood (spade bits and standard twist bits)
- Carriage bolts, lag screws (if not included in kit)
- Safety glasses and hearing protection (required for saw work)
Tools for Vinyl Pergola Kits
- Cordless drill/driver
- Level
- Rubber mallet
- Tape measure
- Step ladder
Universal Requirements (All Materials)
Regardless of kit type, you will also need:
- String line and stakes (for layout)
- Pencil or marker
- Work gloves
- Sunscreen (seriously, you will be outside all day)
Budget tip: if you need a hammer drill or miter saw for a single project, rent it from your local home improvement store. A one-day rental runs $40 to $75 and saves you from buying a $200+ tool you may not use again. The right tools turn even larger pergola kits DIY into a smooth, manageable process.
Step-by-Step DIY Installation Overview
While every kit brand has its own specific instructions, the general installation process follows the same phases. Here is what to expect from start to finish, with realistic time estimates for each phase.
Phase 1: Site Preparation (1 to 2 Hours)
Mark your pergola footprint using stakes and string. Verify the area is level. If you are mounting on an existing concrete slab or paver patio, check that the surface is level within 1/4 inch across the span. If you are building on a deck, confirm the deck framing can support the additional load (consult the kit manufacturer for weight specs).
Phase 2: Footings and Anchoring (1 to 3 Hours)
For concrete slab mounts, you will drill anchor holes and install post base brackets. For ground mounts, you will dig footing holes (typically 12 inches in diameter and 36 to 48 inches deep, depending on your local frost line) and pour concrete piers. Ground-mount footings need to cure for 24 to 48 hours before you proceed, so plan this step for the day before your main build.
Phase 3: Post Setting (1 to 2 Hours)
Stand each post in its base bracket and temporarily brace it plumb using 2x4 braces and stakes. This is where having helpers matters. Someone holds the post, someone checks the level, and someone tightens the base bolts. Double-check plumb on two axes before moving to the next post.
Phase 4: Beam and Header Mounting (2 to 3 Hours)
With posts standing plumb and braced, lift beams into position and bolt them to the post tops. For a pre-drilled aluminum kit, this goes quickly. For wood kits requiring notching or through-bolting, add an extra hour. This is typically the most physically demanding phase, as you are lifting the heaviest components overhead.
Phase 5: Rafter or Louver Installation (2 to 3 Hours)
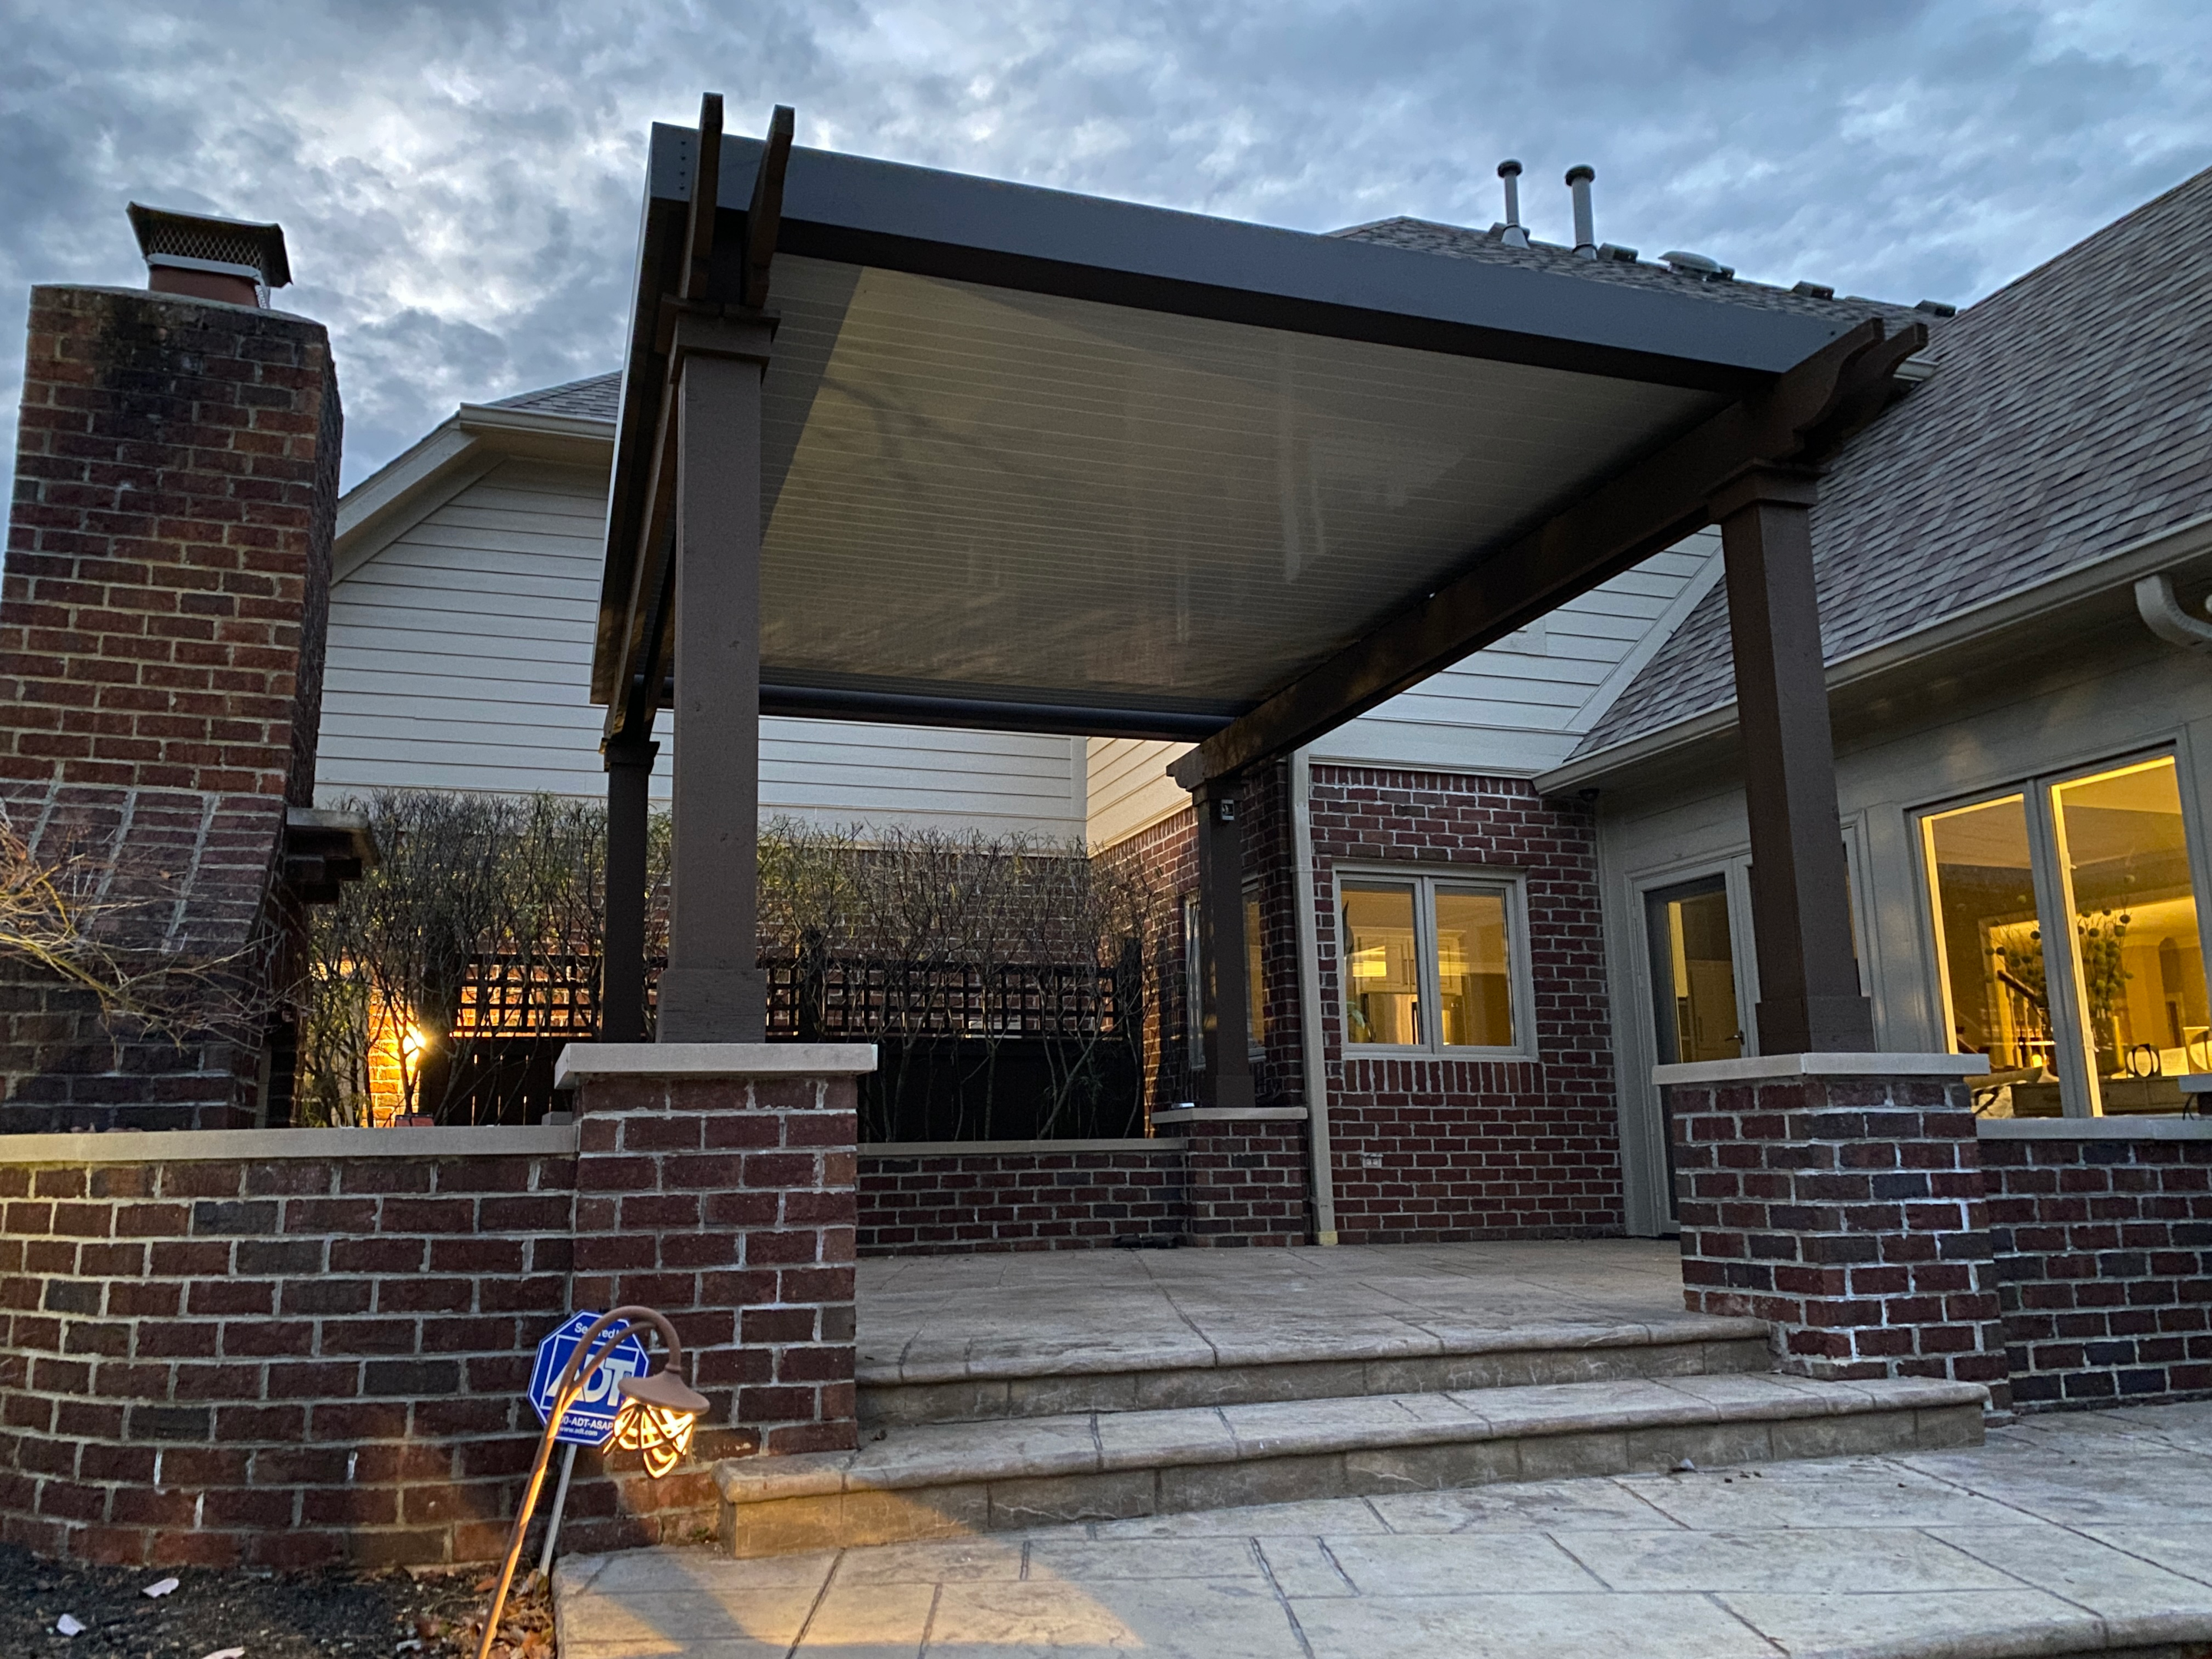
Rafters (wood/vinyl) or louver panels (aluminum) get mounted across the beams. For louvered pergola kits, this includes connecting the motorized drive system and running the electrical connection. The Luxury Pergola kits include a pre-wired motor assembly, so you are mostly making plug connections rather than running new wiring.
Phase 6: Finishing and Testing (30 Minutes to 1 Hour)
Remove temporary braces. Tighten all bolts to final torque specs. For motorized kits, connect power and test louver operation. Walk the perimeter and check every connection point. Take your time here. A loose bolt found now saves a headache later.
Total Time Estimates
- Aluminum DIY pergola kit (pre-drilled): 8 to 10 hours total, completable in one day
- Wood pergola kit: 12 to 20 hours, typically a full weekend
- Vinyl pergola kit: 4 to 8 hours, completable in one day
Among all easy pergola kits on the market, pre-drilled aluminum delivers the best combination of fast pergola kit assembly and long-term structural integrity.
These times assume you have all tools ready, all helpers present, and no major site complications. Add 2 to 4 hours if you need to pour concrete footings (plus 24 to 48 hours of cure time).
Common DIY Mistakes and How to Avoid Them
After hundreds of DIY pergola installs, the same mistakes show up again and again. Here are the ones that cause the most problems and how to avoid them.
1. Not Checking Level (and Rechecking It)
A post that is 1/4 inch off plumb at the base will be 1+ inch off at the top. That compounds when you try to mount beams and rafters. Check plumb on every post, on two axes, at every stage. Check it when you first stand the post. Check it again after tightening the base bolts. Check it a third time after mounting beams. If anything shifted, loosen and adjust before moving forward.
2. Skipping Proper Footings
Some homeowners try to bolt a pergola to a thin paver patio or a deck that cannot support the weight. This is how pergolas fail in storms. Your footings need to reach below the frost line in your area (36 to 48 inches in most of the northern US) and provide enough mass to resist uplift in high winds. If you are anchoring to an existing concrete slab, verify the slab is at least 4 inches thick. If it is a thin decorative overlay, you need deeper anchoring.
3. Using the Wrong Fasteners
Galvanized steel fasteners in aluminum pergolas cause galvanic corrosion. Stainless steel fasteners in cedar cause black staining. The fasteners that come with your kit are matched to the material for a reason. If you lose a bolt and need a replacement, match the exact spec, including the metal type, not just the size.
4. Ignoring Local Building Codes
Many municipalities require a building permit for pergola installations, especially structures over a certain size (often 120 square feet). Some HOAs have additional restrictions on height, setback from property lines, and materials. Check before you order. Pulling a permit is usually simple and inexpensive ($50 to $200), but building without one can result in fines or a forced teardown.
5. Not Having Enough Help
This is not a solo project, regardless of material. Even lightweight vinyl kits are easier and safer with two people. For aluminum and wood kits, you need at least 2 to 3 helpers for beam lifting and post bracing. Recruit help before you set your build date, not the morning of.
6. Rushing the Layout
Spending an extra 30 minutes on precise layout with string lines and diagonal measurements saves hours of frustration during assembly. Measure your diagonals to confirm the footprint is square. If the diagonals are not equal, your pergola will be racked, and every subsequent step will fight you.
7. Forgetting Drainage
If you are installing a pergola with a solid or louvered roof, water has to go somewhere. Make sure the structure has a slight pitch toward your planned drainage path. The Luxury Pergola kits have a built-in gutter and drainage system, but not all kits include this. If yours does not, plan for water runoff before you start the build.
DIY Kit vs. Hiring a Contractor

Here is the cost comparison that matters. The numbers below reflect real market pricing in 2026 for a comparable quality aluminum louvered pergola.
| Size | DIY Kit Cost (Aluminum) | Professionally Installed (Comparable) | You Save |
|---|---|---|---|
| 10 x 10 | $10,000 - $14,000 | $30,000 - $40,000 | $16,000 - $26,000 |
| 10 x 13 | $14,000 - $18,000 | $35,000 - $50,000 | $17,000 - $32,000 |
| 10 x 20 | $20,000 - $28,000 | $45,000 - $65,000 | $17,000 - $37,000 |
The savings come from one place: you are cutting out the middlemen. Professionally installed systems from brands like StruXure or Azenco route through dealers and installers, each adding their margin. A direct-to-consumer aluminum pergola kit from a manufacturer like The Luxury Pergola delivers the same (or better) quality materials without those markup layers.
When DIY Makes Sense
- You (or someone you know) can handle basic tools: drill, level, socket wrench
- You have 2 to 3 helpers available for a full day
- You are mounting to an existing concrete slab or deck in good condition
- You want to save $15,000 to $30,000+ on the same quality product
- You enjoy hands-on projects and want the satisfaction of building it yourself
When Hiring a Pro Makes Sense
- You need extensive site work (grading, new concrete pours, retaining walls)
- The install involves complex mounting (wall-attached, multi-story, unusual angles)
- You physically cannot participate in lifting heavy components
- Local building codes require a licensed contractor for the permit
- You simply do not want to do it yourself, and that is fine
If you want the factory-direct price of a DIY kit but prefer professional installation, The Luxury Pergola's growing network of certified installers can handle the build for you. You still buy the kit direct (no dealer markup), and a vetted local installer handles the physical work.
Frequently Asked Questions About DIY Pergola Kits
How long does it take to install a DIY pergola kit?
It depends on the material. A pre-drilled aluminum pergola kit like The Luxury Pergola takes approximately 8 to 10 hours with 2 to 3 people, completable in a single day. Wood pergola kits take 12 to 20 hours, typically a full weekend. Vinyl kits are the fastest at 4 to 8 hours. These estimates assume you have an existing level surface and do not need to pour new footings.
Do I need a permit for a DIY pergola kit?
In most municipalities, yes. Structures over 120 square feet typically require a building permit. Some areas require permits for any permanent attached or freestanding structure. The permit process is usually straightforward: submit a site plan, the kit's engineering specs, and pay a fee ($50 to $200). Your pergola kit manufacturer should be able to provide stamped engineering drawings if your local building department requires them.
Can one person install a pergola kit alone?
For small vinyl kits (8x8 or smaller), a solo install is possible but not recommended. For aluminum and wood kits, a solo install is not feasible. Posts and beams are too heavy and too long to safely lift, position, and fasten by yourself. Plan for at least 2 helpers, and 3 is better.
What is the best material for a DIY pergola kit?
Aluminum is the best material for most DIY builders. It arrives fully pre-cut and pre-drilled, requires no cutting or drilling on site, and needs zero maintenance after installation. Wood offers a traditional look but requires more skill, more tools, and ongoing upkeep. Vinyl is the cheapest and lightest but sacrifices durability and wind/snow performance.
How much do DIY pergola kits cost?
Pricing varies widely by material and quality. Vinyl kits start at $1,500 for basic sizes. Wood (cedar) kits range from $2,500 to $8,000. Aluminum kits range from $4,000 for lightweight imported models to $10,000 to $25,000+ for commercial-grade, American-made kits with motorized louvers, lifetime warranties, and engineering specs rated for extreme weather.
Are DIY pergola kits worth it compared to hiring a contractor?
If you are comfortable with basic tools and have a couple of helpers, DIY pergola kits save you $15,000 to $30,000+ compared to professionally installed systems of the same quality. The kit itself is the same product. The only difference is who assembles it. For someone with moderate DIY experience, it is one of the highest-value home improvement projects you can do.
What size pergola kit should I buy?
Measure your patio or planned coverage area and add 12 to 18 inches on each side for overhang. For a standard 4-person dining area, a 10x10 is sufficient. For an outdoor living room with a couch and chairs, go 10x13 or larger. For outdoor kitchens or pool coverage, 10x16 to 10x20 is typical. Use a product configurator to see exact pricing for your dimensions.
Do DIY pergola kits come with a warranty?
Warranty coverage varies dramatically by brand. Budget vinyl and imported aluminum kits typically offer 1 to 5 year warranties. Mid-range wood and aluminum kits offer 5 to 10 years. Premium manufacturers like The Luxury Pergola offer a lifetime warranty covering the frame, louvers, motor, and electronics. Always read the warranty before purchasing and confirm it covers DIY installation (some warranties are voided if not installed by a certified contractor).
Final Thoughts
The right DIY pergola kit turns an intimidating construction project into a manageable weekend build. The key is choosing a kit that is genuinely designed for homeowner installation: pre-cut, pre-drilled, hardware included, and backed by real support if you have questions during the build.
Aluminum kits, particularly those from manufacturers like The Luxury Pergola, deliver the best combination of easy pergola kit assembly, structural performance, and long-term value. Zero maintenance, lifetime warranty, and engineering specs that handle whatever your climate throws at it.
Wood kits are a solid choice if you have the tools and the skill, and you are willing to commit to the ongoing maintenance. Vinyl works for budget projects in mild climates where longevity is not the priority.
Whatever material you choose, take your time with layout and leveling, recruit enough helpers, and do not skip the footings. Build it right the first time, and your pergola will be the best investment you make in your outdoor space.
Ready to start? Configure your pergola and get an instant price here.

